November 7, 2026
Bumper Bracket: A Buyer's Guide to Fit, Function, and Material Selection
A practical guide for automotive buyers and engineers on specifying bumper brackets: how they connect bumper beams to the body, what material and process choices affect fit and durability, and how to verify supplier capability.
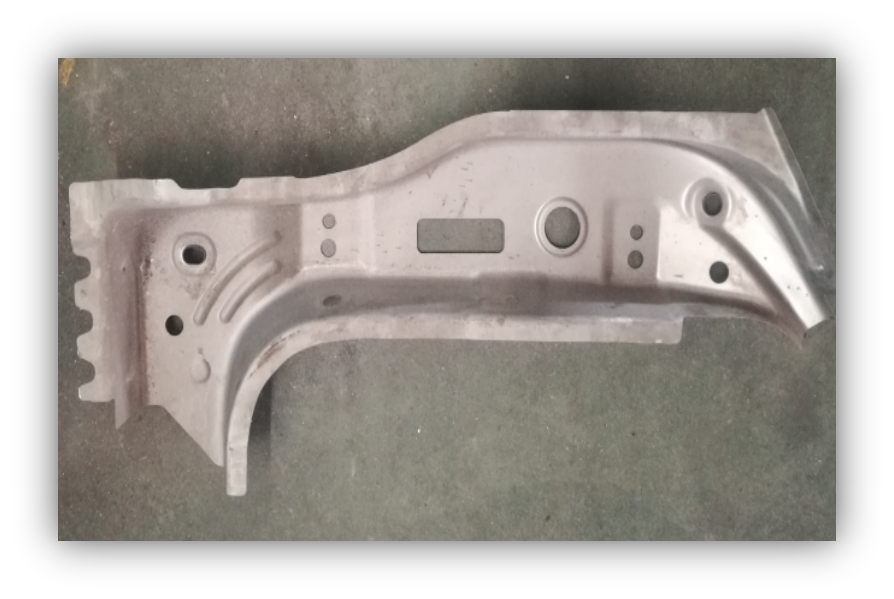
What a Bumper Bracket Does in the Vehicle Structure
A bumper bracket is the interface between the bumper beam and the vehicle body. It carries the beam, sets its position, and transfers impact loads into the body structure. The bracket is small relative to the beam, but it decides whether the beam stays aligned in service and whether crash energy reaches the intended load path.
Bumper brackets are not a single commodity. The same name covers beam-to-rail mounting brackets, fascia support brackets, and energy-absorber brackets. Each has a different job, so selection criteria differ. This guide focuses on structural brackets that connect the bumper beam to the front or rear longitudinal rails, because those carry safety-related loads.
How Bumper Brackets Fit With Beams, Rails, and Fascia
The bracket sits between two components with different tolerances. The bumper beam is often a hot-formed or roll-formed steel part with its own dimensional variation. The rail is a welded body structure with build variation from the body shop. The bracket must absorb that stack-up without preloading the beam or leaving a visible gap at the fascia.
Three interfaces matter:
Beam interface: bolt holes or weld flanges that position the beam laterally and vertically.
Rail interface: mounting points that transfer axial and shear loads into the longitudinal rail.
Fascia interface: locating features that keep the visible bumper cover aligned with the body.
If any interface is under-constrained, the beam can shift during minor impacts or road vibration. If it is over-constrained, assembly becomes difficult and the bracket may crack at bolt holes. Good bracket design balances both.
Material and Process Options for Bumper Brackets
Bracket material follows from the load case. A fascia support bracket sees little load and can be plastic or thin stamped steel. A beam-to-rail bracket in a crash load path needs higher strength and controlled deformation.
Common choices include:
Conventional stamped steel: low cost, widely available, suitable for moderate loads. Springback can affect hole position, so fixtures and checking are needed.
Hot-formed steel: formed at high temperature and quenched in the die to create a martensitic structure. Suppliers of hot-formed body parts describe tensile strength above 1500 MPa for these grades, with reduced springback compared with cold stamping. That combination suits brackets that must be strong and dimensionally consistent.
Aluminum extrusions or castings: used where mass reduction matters more than raw strength. They require different joining methods and galvanic isolation from steel beams.
Hot forming is not automatically the right answer. It adds process steps and cost, and it is justified only when the bracket is part of the crash load path or when dimensional control at the beam interface is critical. For a low-load fascia bracket, a conventional stamping or engineering plastic part is usually more economical.
Selection Criteria: A Decision Framework
Use the following sequence to narrow the bracket specification before requesting quotes. It separates safety-critical brackets from cosmetic supports and avoids over-specifying low-load parts.
Criterion | What to define | Why it changes the choice |
|---|---|---|
Load path role | Crash structure or cosmetic support | Crash-path brackets need validated strength and energy transfer; cosmetic brackets prioritize fit and cost. |
Attachment method | Bolted, welded, or adhesive-bonded | Welded brackets need weldable steel grades; bolted brackets need hole position control and slip resistance. |
Dimensional tolerance | Hole position and flange flatness | Tight tolerances at the beam interface reduce assembly shimming and fascia gap issues. |
Corrosion exposure | Underbody, wheel-arch, or protected zone | Exposed brackets need coating or plated fasteners; hot-formed parts may need post-process treatment. |
Volume and tooling | Annual volume and model life | Hot forming requires dedicated dies; low-volume programs may not amortize the tooling. |
A useful rule: if the bracket is in the primary crash load path, specify it with the same rigor as the beam. If it only holds fascia, specify it for fit and corrosion and keep cost down.
Verification Steps Before You Commit to a Supplier
Bracket quality problems usually appear at assembly, not at goods-in inspection. Verify the process, not just the sample.
Ask for the control plan. It should show how hole position, flange angle, and coating thickness are checked in production, not only in the prototype phase.
Check the dimensional report. Request a first-article inspection report with measured values against the drawing, including the beam and rail interfaces.
Confirm material traceability. For hot-formed brackets, ask for the steel grade certificate and evidence of the quenching process window.
Review corrosion protection. Confirm the coating or plating specification and how it is verified after forming, since hot forming can affect surface condition.
Run a fit trial. Assemble brackets to production-intent beams and rails before full approval. Stack-up issues surface quickly here.
These steps apply to any bracket supplier. They are not a substitute for the OEM's own PPAP or equivalent approval process, which remains the formal release gate.
Common Failure Modes and How to Design Around Them
Bracket failures tend to cluster around a few causes:
Hole elongation or cracking at bolted joints: usually from insufficient bearing area or overtightening. Specify bolt grade, torque, and washer requirements.
Fatigue cracking at weld toes: common on welded brackets in vibration-heavy locations. Consider a change in joint geometry or a move to bolted attachment.
Corrosion at coating damage points: forming and assembly can scratch coatings. Specify touch-up and use compatible fastener materials.
Fascia misalignment: often a tolerance stack-up issue rather than a bracket defect. Locating features on the bracket should be designed with the stack-up in mind.
Each failure mode has a design or specification response. Addressing them at the drawing stage is cheaper than correcting them after tooling is cut.
Where Hot-Formed Brackets Fit in a Lightweighting Strategy
Lightweighting programs often focus on the beam and rail, but brackets contribute mass and part count. Consolidating several stamped brackets into one hot-formed part can reduce weight and assembly steps, provided the consolidated part can be formed without cracks and meets the crash load path requirements.
Hot forming allows complex shapes with high strength, but it also limits design freedom: small radii and deep draws can cause thinning. Work with the supplier's forming simulation early. A bracket that looks efficient on paper may need a different geometry once formability is checked.
For buyers comparing hot-formed body parts, the same process logic applies to B-pillar inner panels and bumper beams. The bracket is simply the smallest and most interface-sensitive member of that family.
Next Steps for Sourcing a Bumper Bracket
Start with the load path classification. Then define the interfaces, tolerances, and corrosion exposure. Use those inputs to decide between conventional stamping, hot forming, or another process. Finally, verify the supplier's production control and run a fit trial before approval.
If you are evaluating hot-formed brackets alongside beams or pillar panels, request process documentation and dimensional reports for each part family. That gives you a comparable basis for the sourcing decision.